Deploying the Funds Controller Gateway
How to deploy the Funds Controller Gateway if self hosting central bank connectivity
For a central bank to connect with the RTGS.global Network settlement fabric, an instance of the Funds Controller Gateway (FCG) must be deployed into an Azure subscription in much the same manner as was done for the RTGS.global Network Connector. There are however some values that will need to be entered that your organization will need to have received from RTGS.global before you begin. Please check that you have these values and if not please email support@rtgs.com to request them.
Step 1: Locate the gateway deployment package on Azure Marketplace
The RTGS.global FCG is available as a free public offering on Azure Markeplace from where the deployment can be directly done. Clicking the 'Get It Now' button will take you to your Azure subscription where you can then install the Gateway.
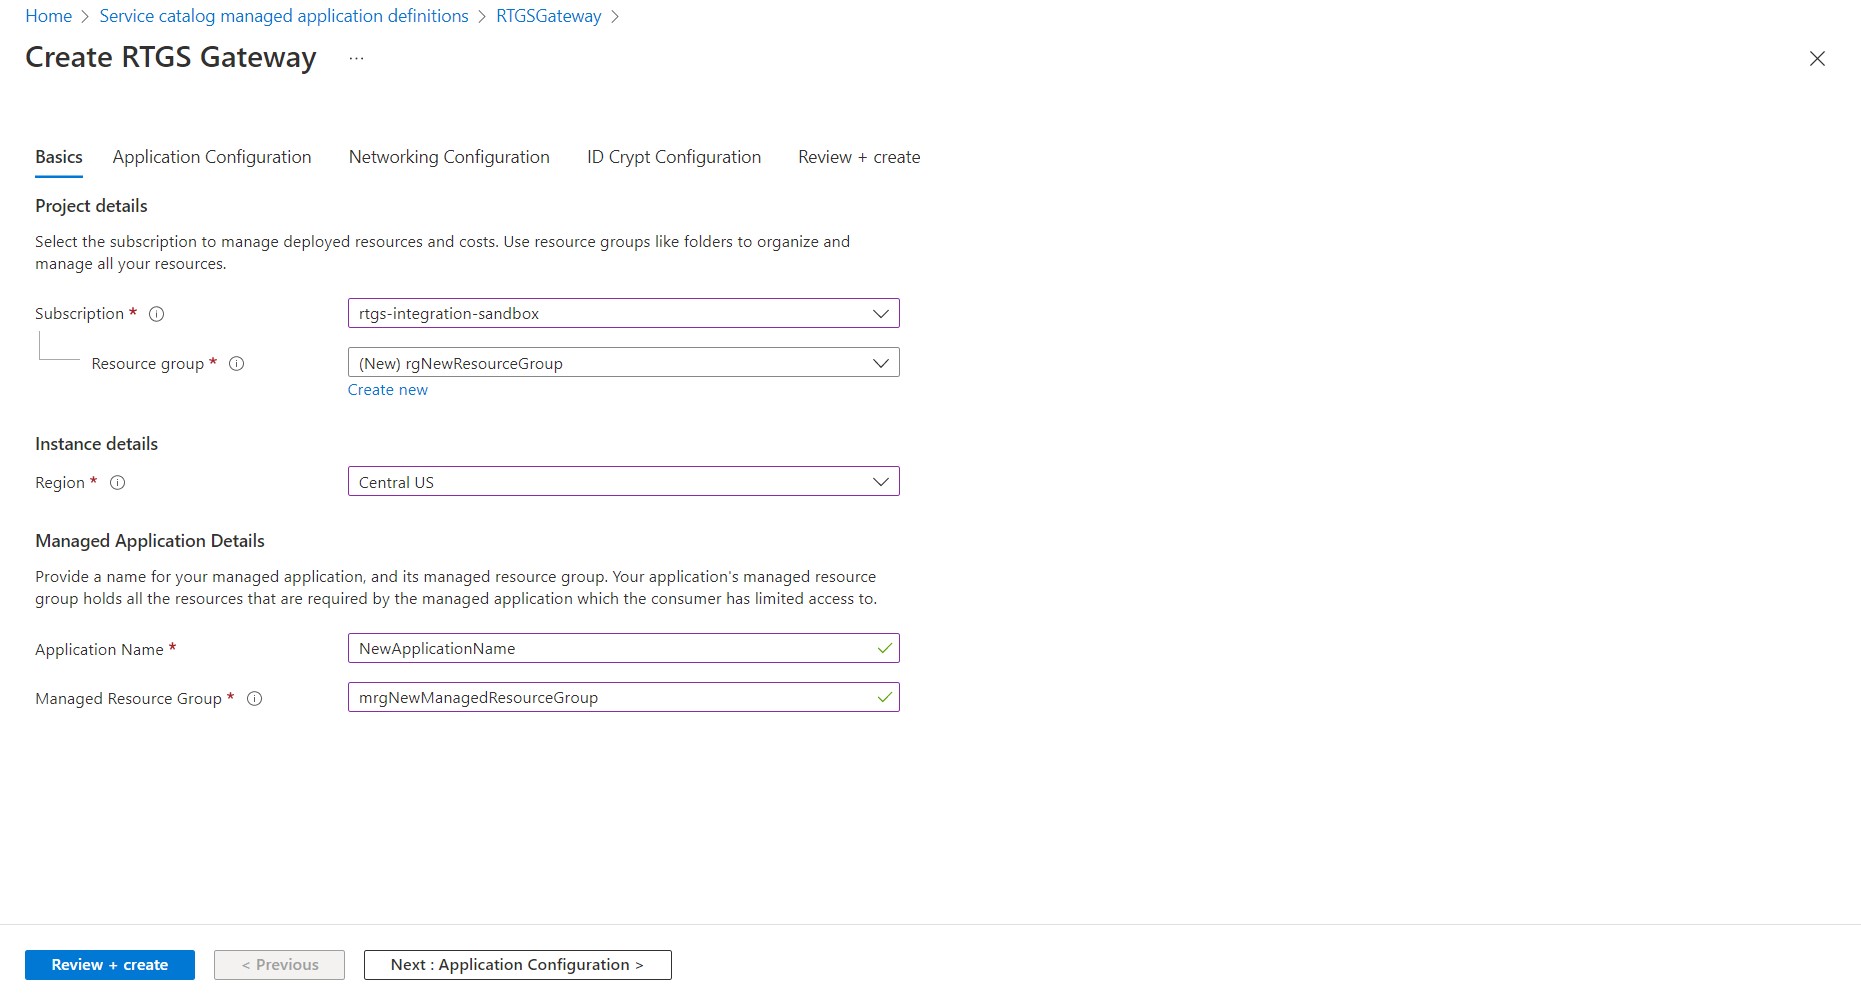
Step 2: Create the gateway deployment
The deployment wizard will collect the information necessary to configure the RTGS.global FCG at installation time. It is recommended that the same subscription and region are used as those into which the Network Connector was deployed, but to create a new resource group for the gateway components. This will make any future maintenance activities easier to manage.
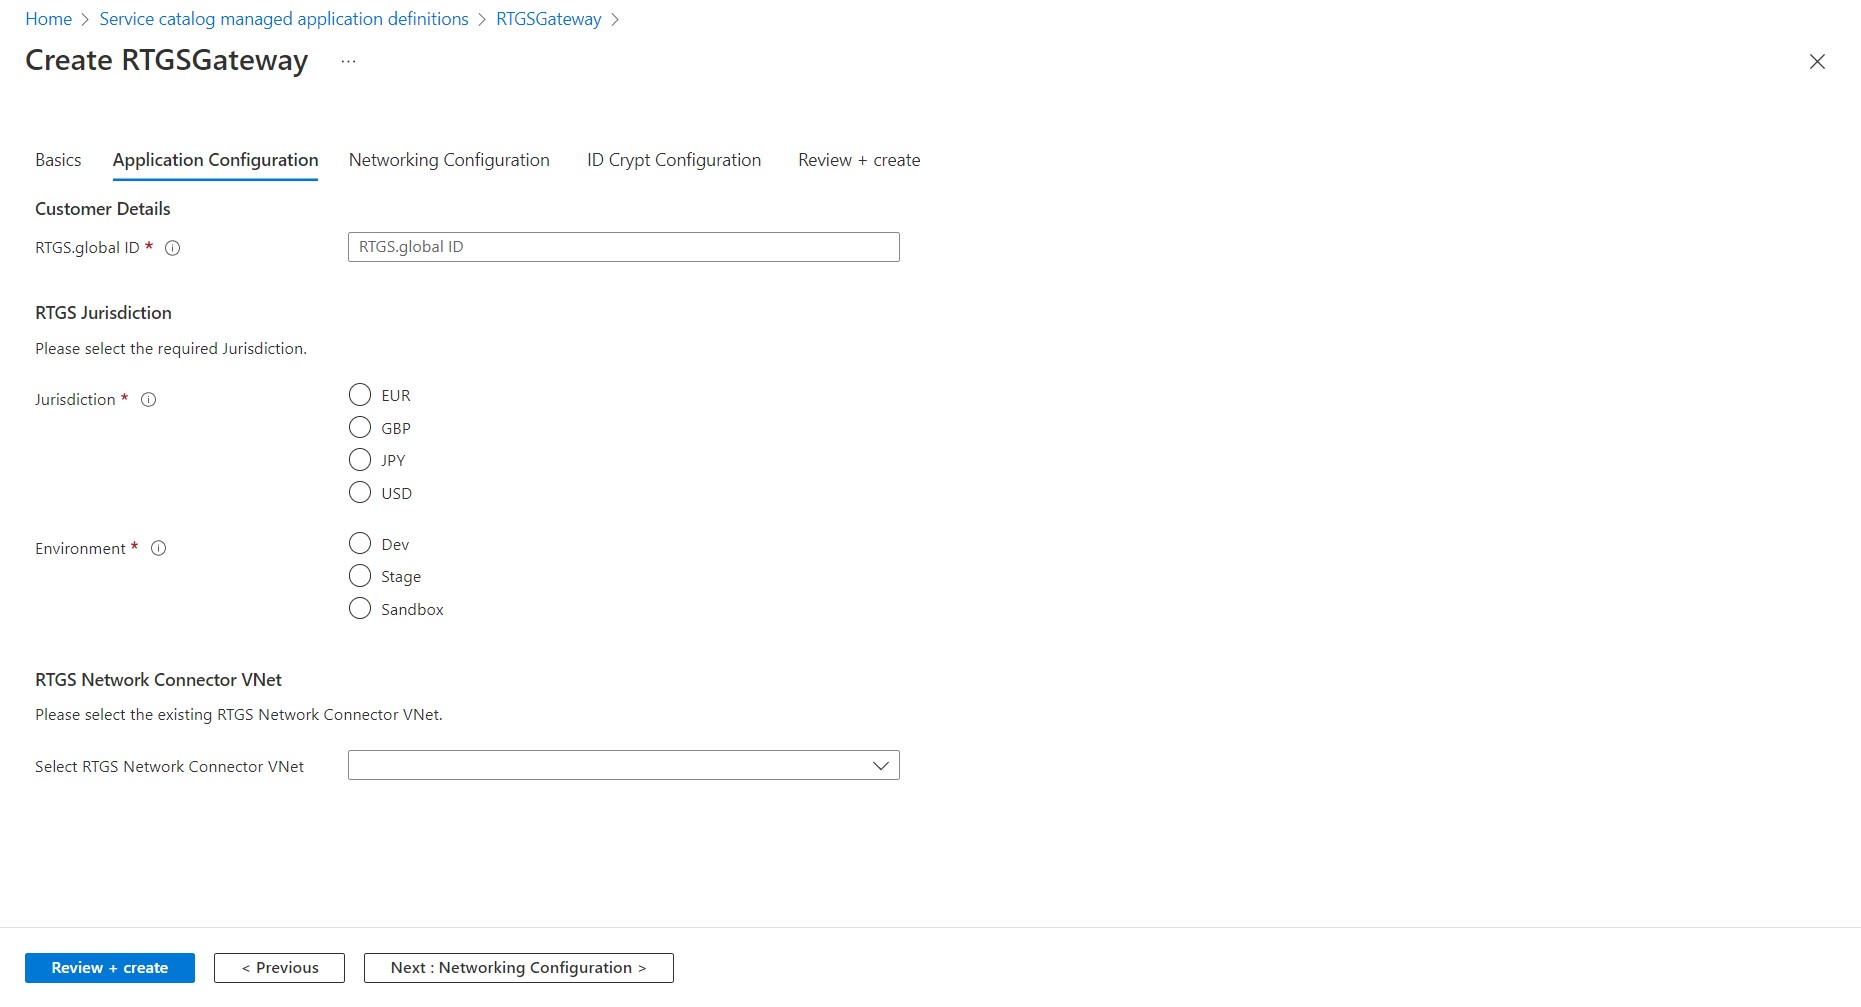
Step 3: Application configuration details of your organization
The RTGS.global ID is unique to your organization and will have been provided by secure email and will need to be entered here. Please ensure that it is entered with no leading or trailing spaces. The other fields must match the values that were entered for the Network Connector deployed into the same environment.
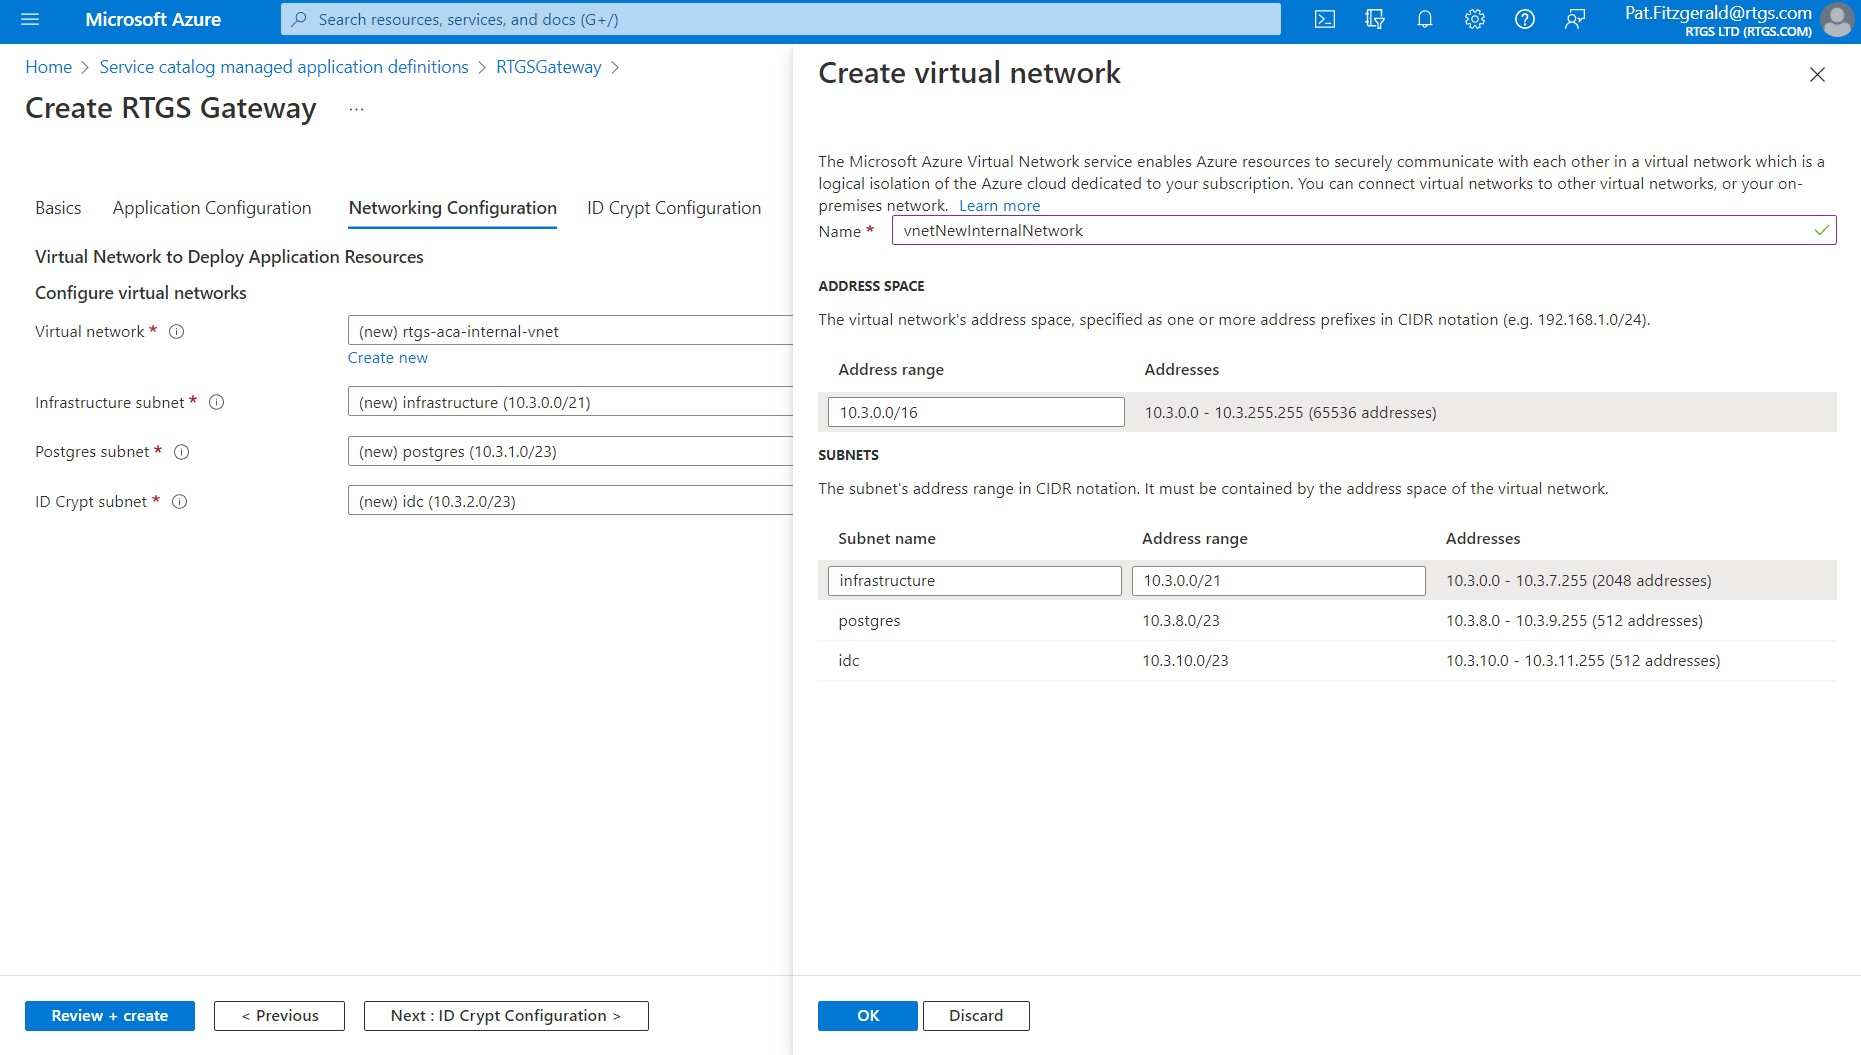
Step 4: Set up a virtual network for the gateway components
As with all applications deployed on Azure, each has its own virtual network in which it runs and can be interconnected with other services. It is recommended that the gateway is given its own virtual network. There are also application components of the gateway that are used by multiple APIs and therefore need to have their own subnet so that they can be accessed independently in parallel during normal operation. These components must sit within the gateway address space but must be logically separated from each other. An example of this can be achieved is shown below.
In addition any applications that will be consuming the gateway APIs will be doing so from your existing corporate network. If the trust relationship between your corporate subnet and the gateway's vnet is being established using network peering please ensure that the IP address space range specified for the gateway vnet does not have any overlapping addresses with those in the subnet address range as otherwise the two networks cannot be peered.
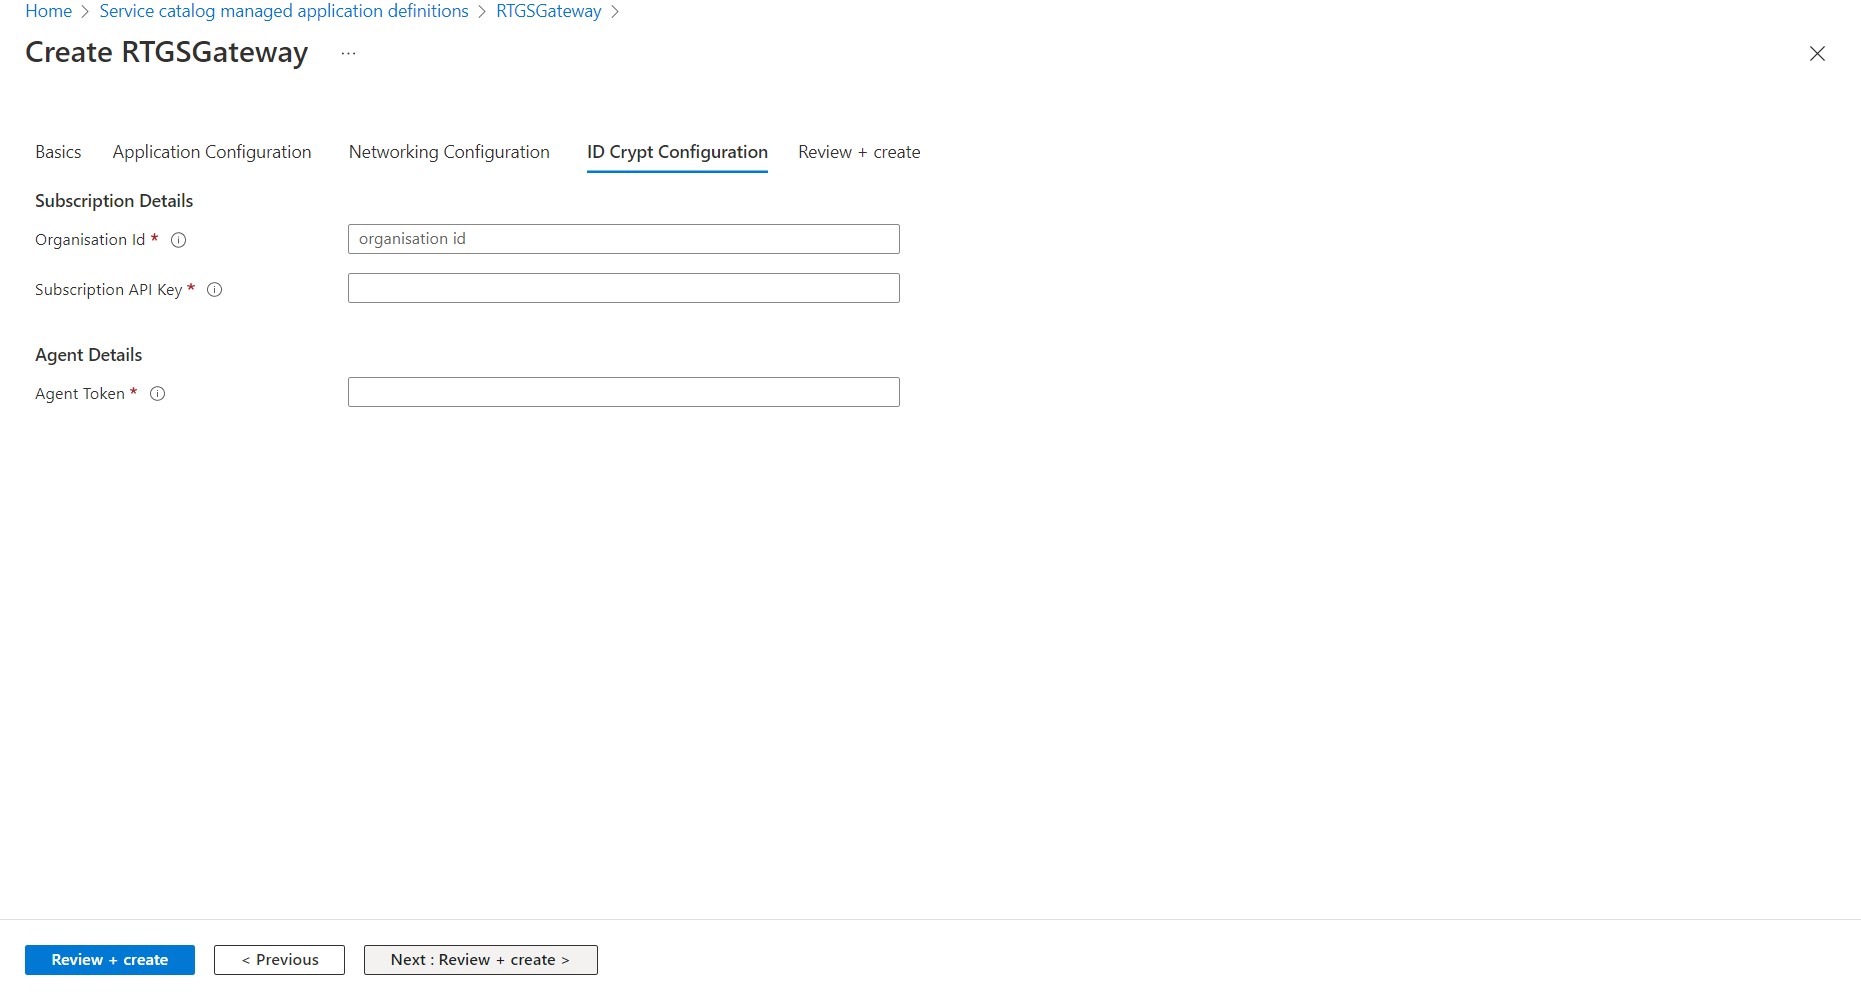
Step 5: Configure the identity and encryption components of the Gateway
Identity management and encryption of communications across the RTGS.global Network is achieved by integration with ID Crypt which leverages the Sovrin decentralized digital identity infrastructure to provide the security framework of the RTGS.global Network. The values required here have also been provided by secure email and are unique to your organization and must be entered exactly as given.
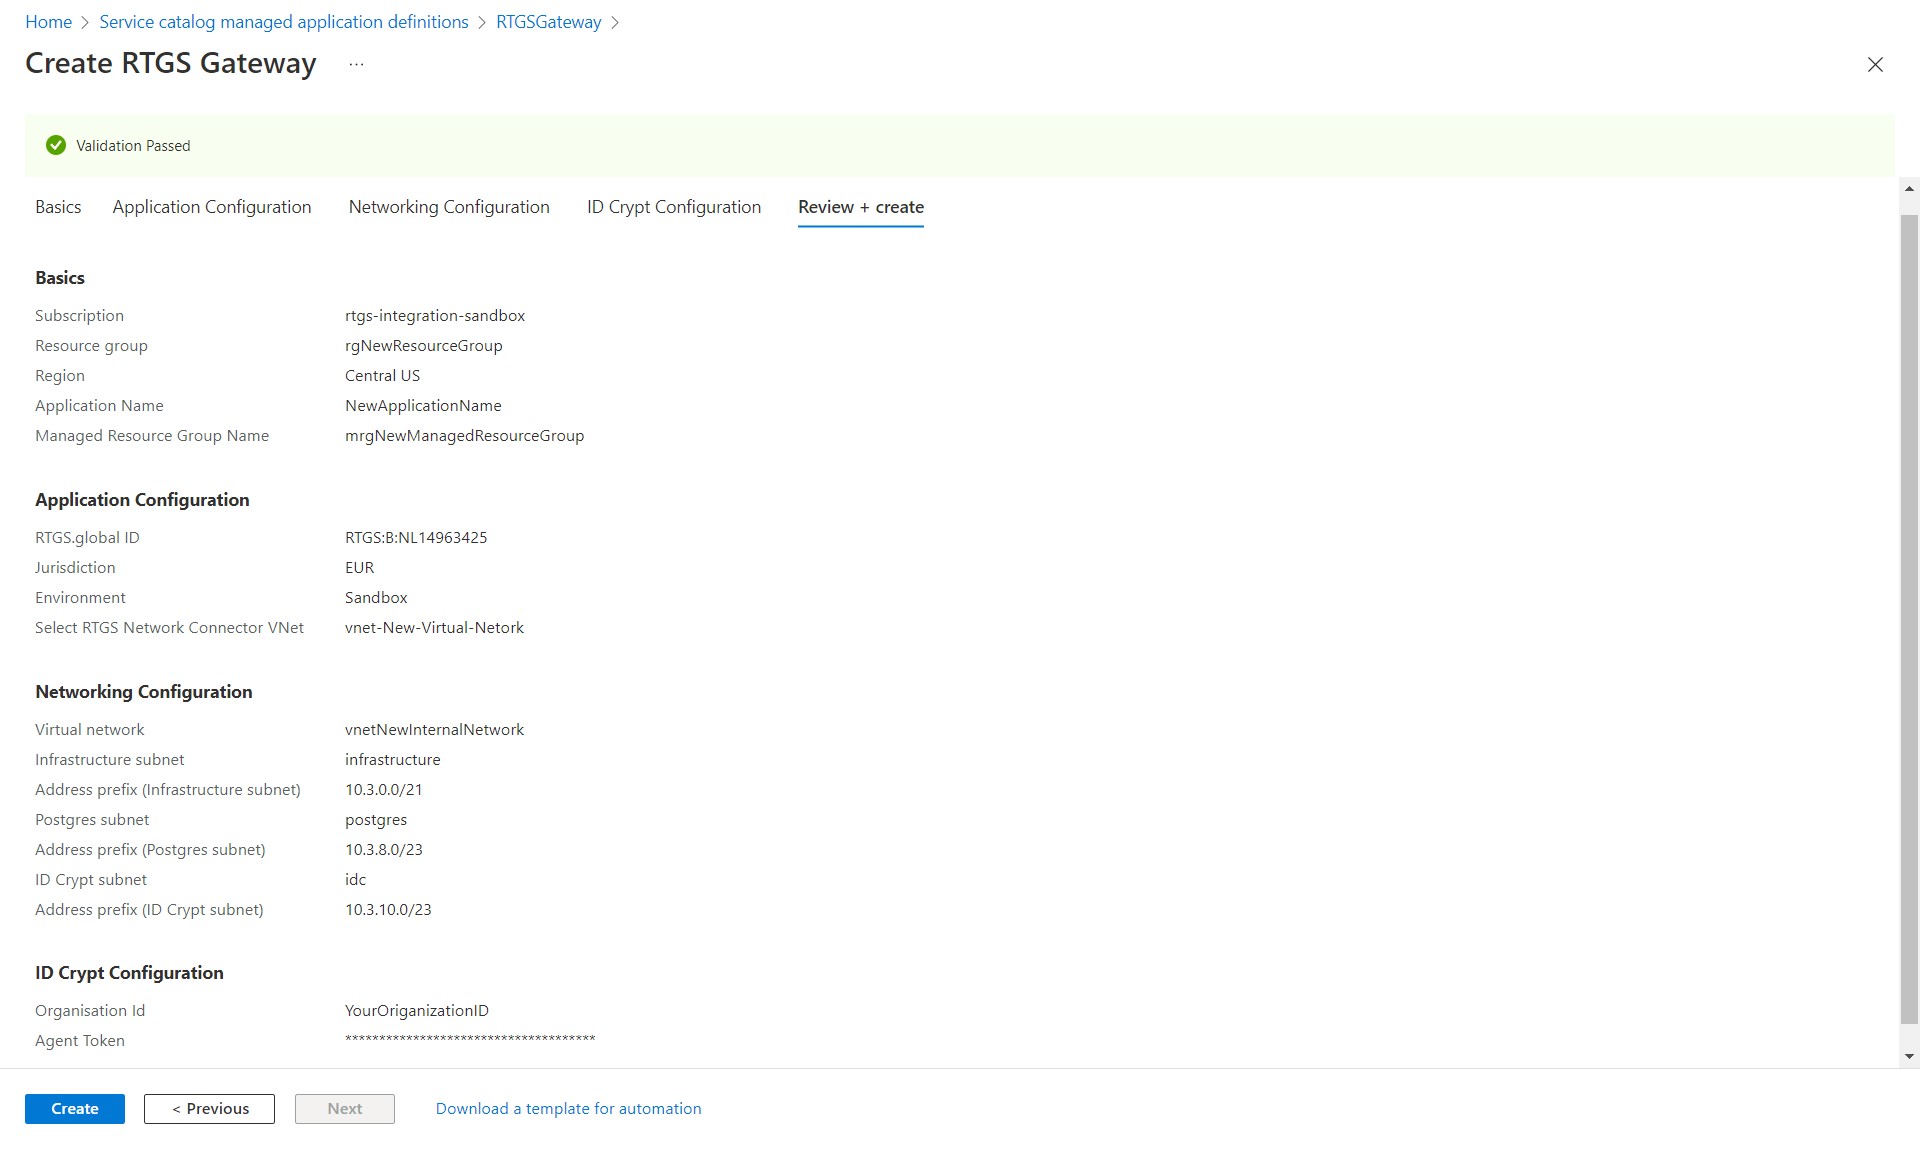
Step 6: Review Gateway configuration and deploy
Review the settings that have been collected by the wizard and unless any changes need to be made click the Create button to start the deployment.
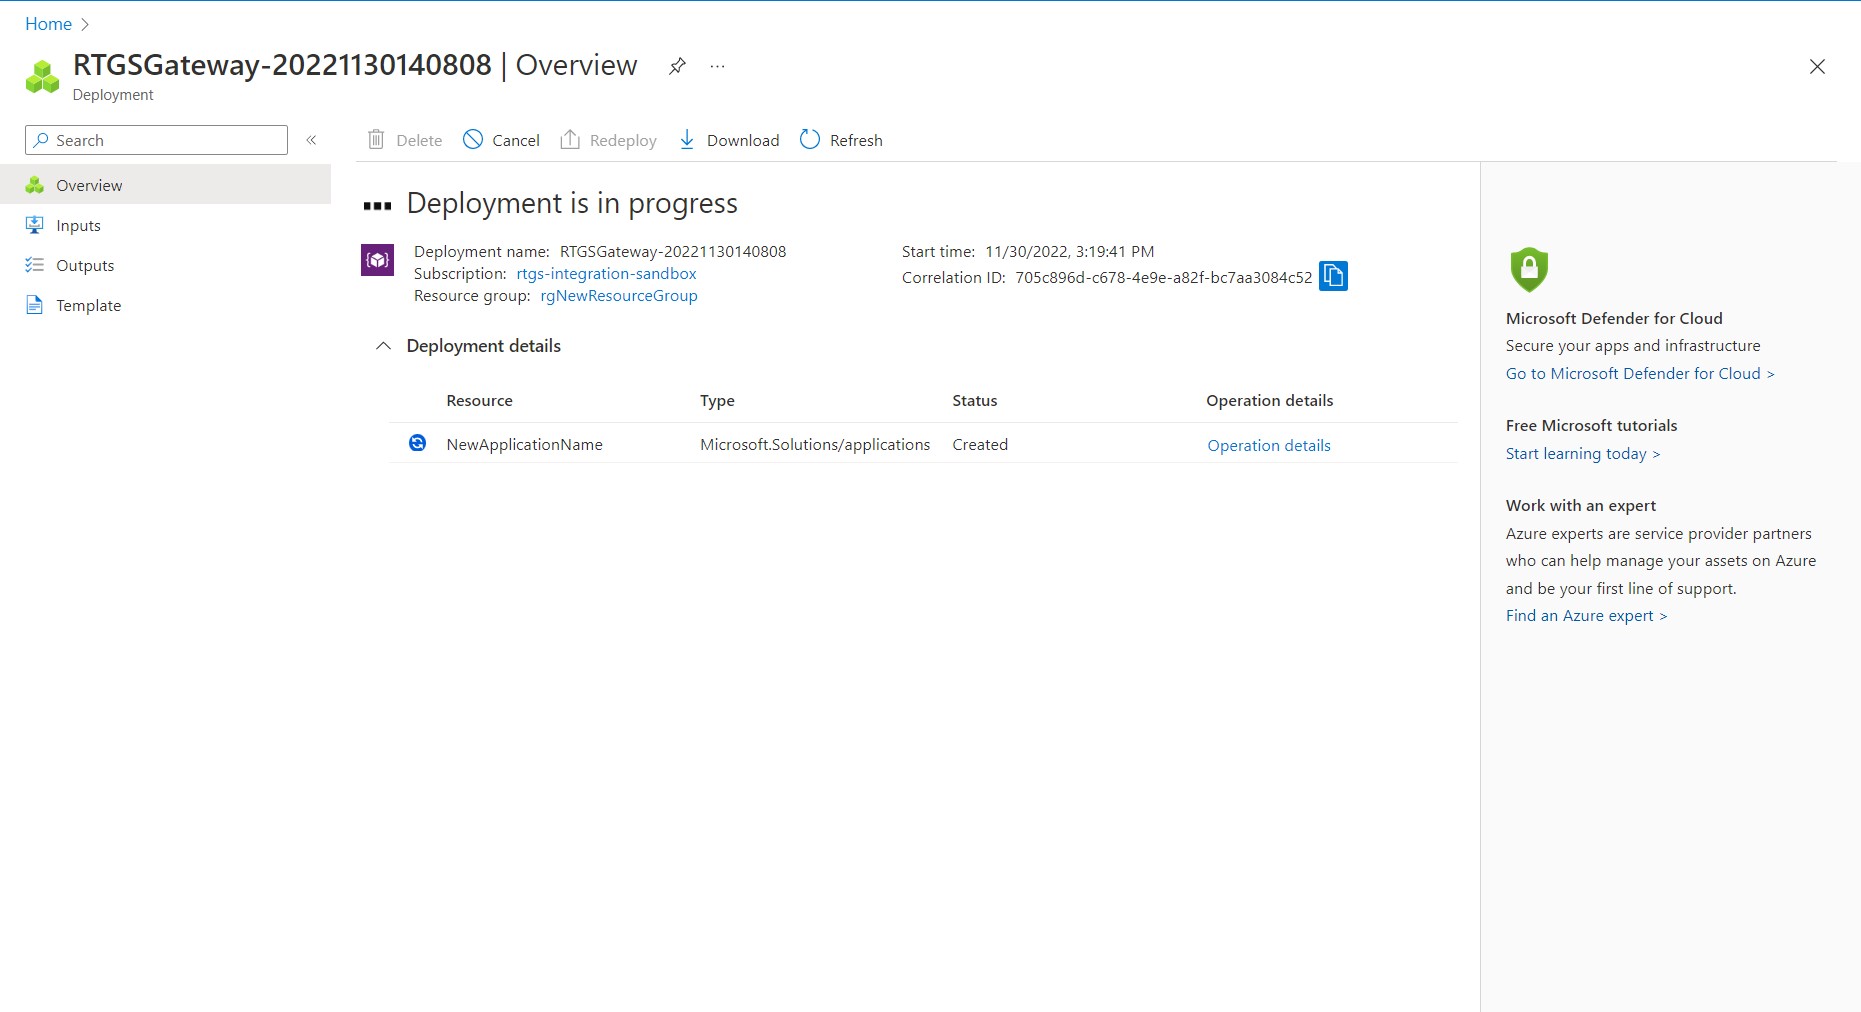
Step 7: Deployment running
The deployment will run in the background and you may not notice much feedback activity if the deployment script doesn't encounter any problems.
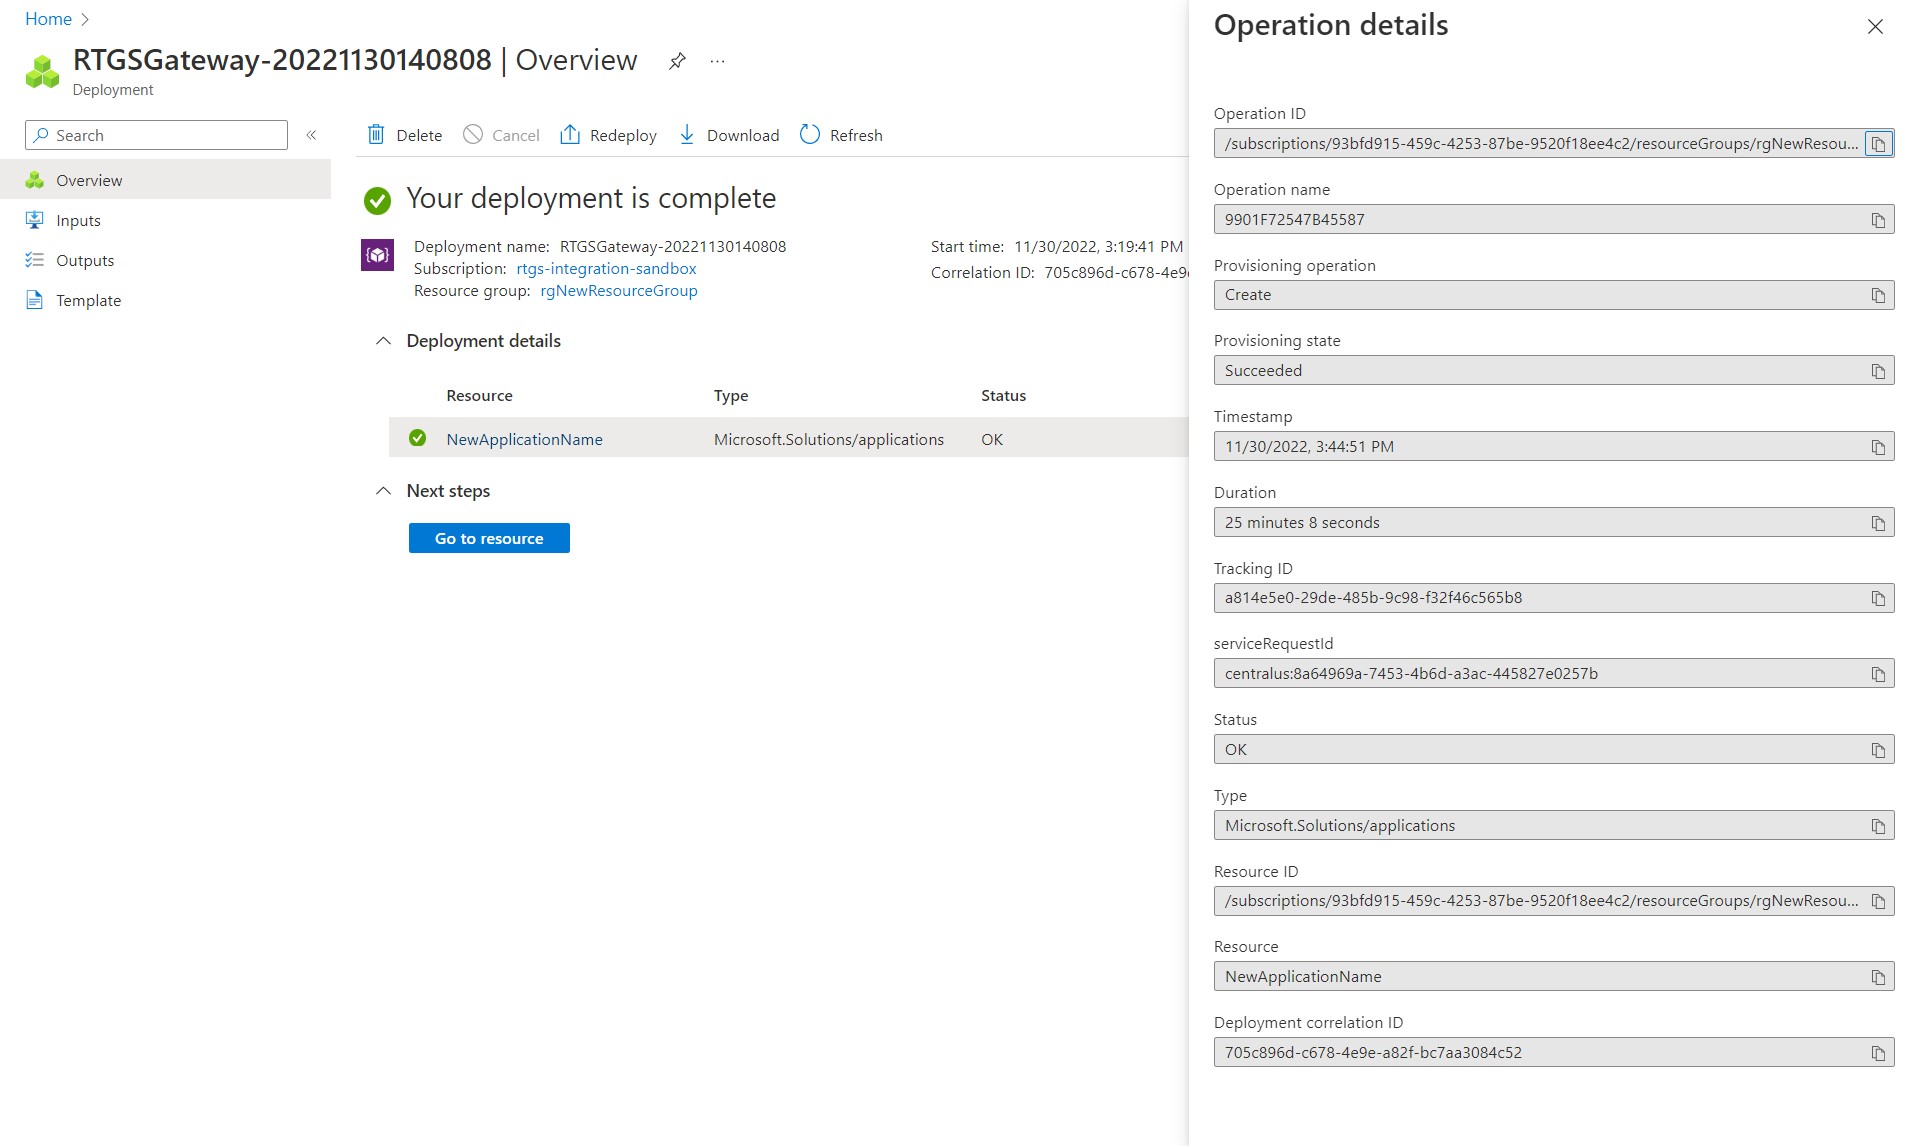
Step 8: Deployment complete
The Azure portal will refresh when the deployment completes and indicate that it has been successful. Clicking on the 'Operation details' link in the 'Deployment Details' section on the portal screen will display several details relating to the Gateway deplopyment that has just finished, including the Duration which as can be seen from the screen image below can take some time to complete.
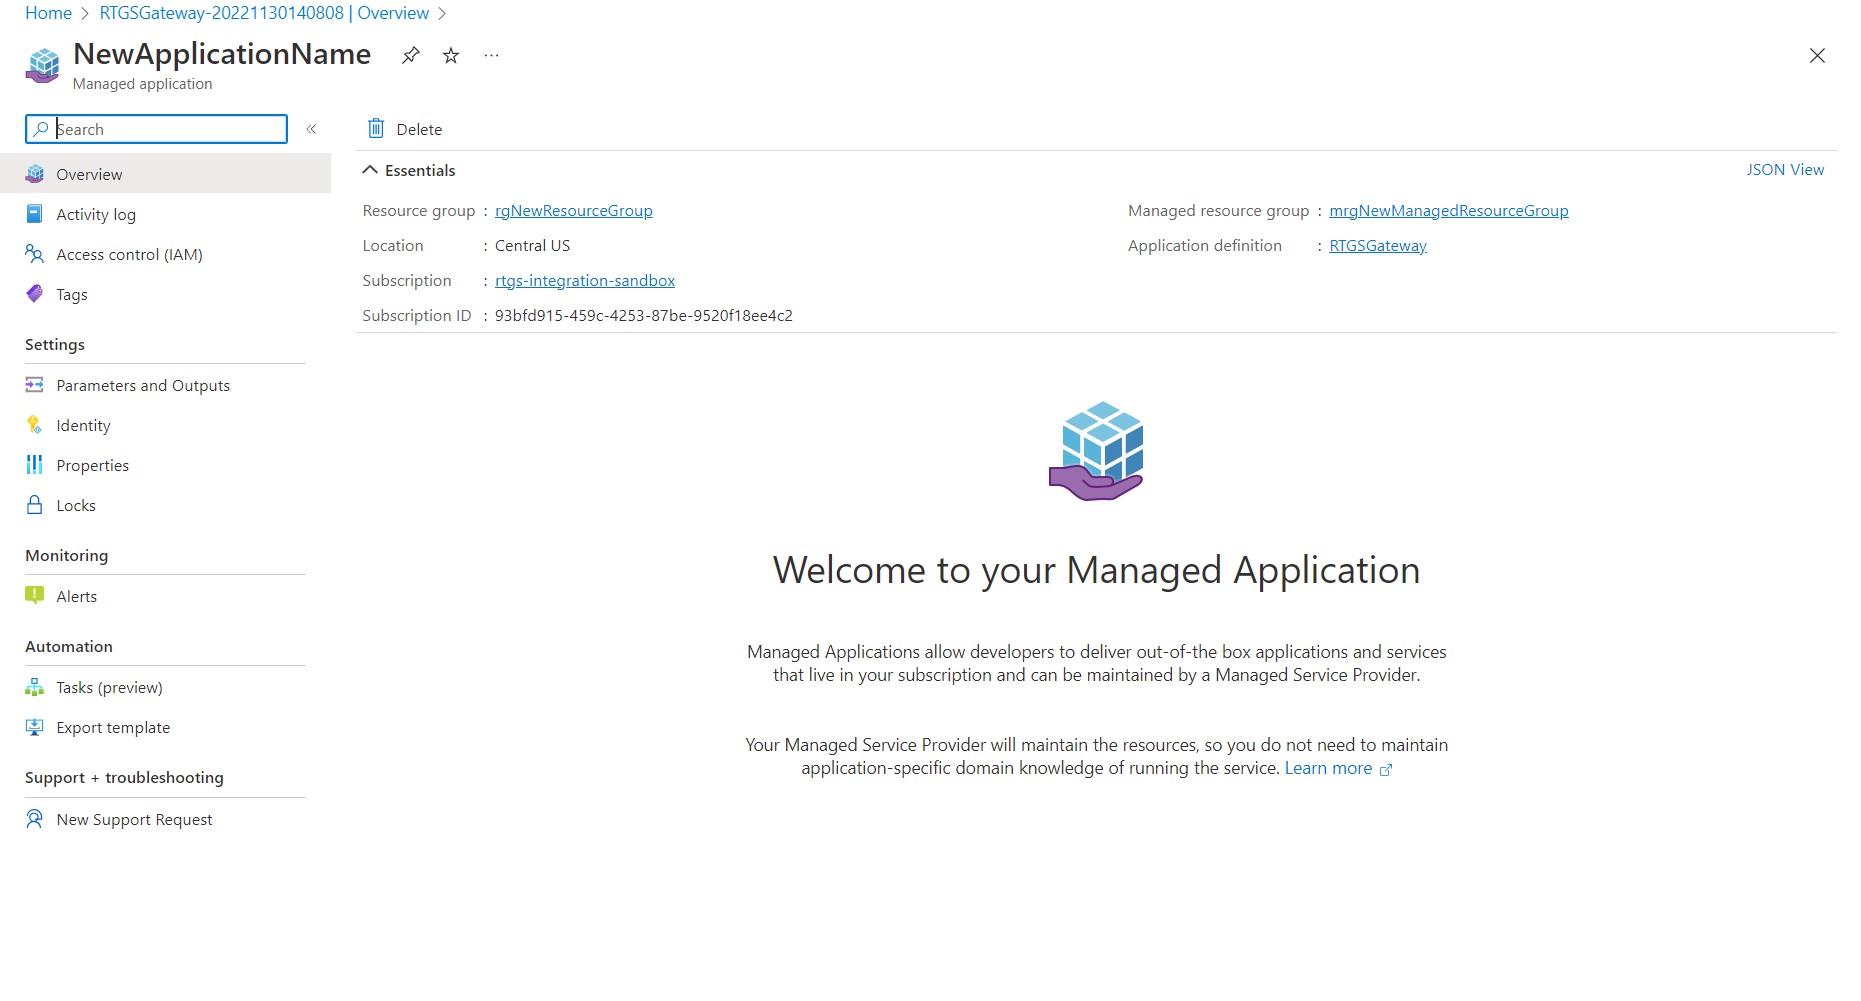
Step 9: RTGS.global Gateway components
Clicking on the 'Go to resource' button of the deployment complete screen will display the overview page of the new Gateway which is deployed as a managed application.
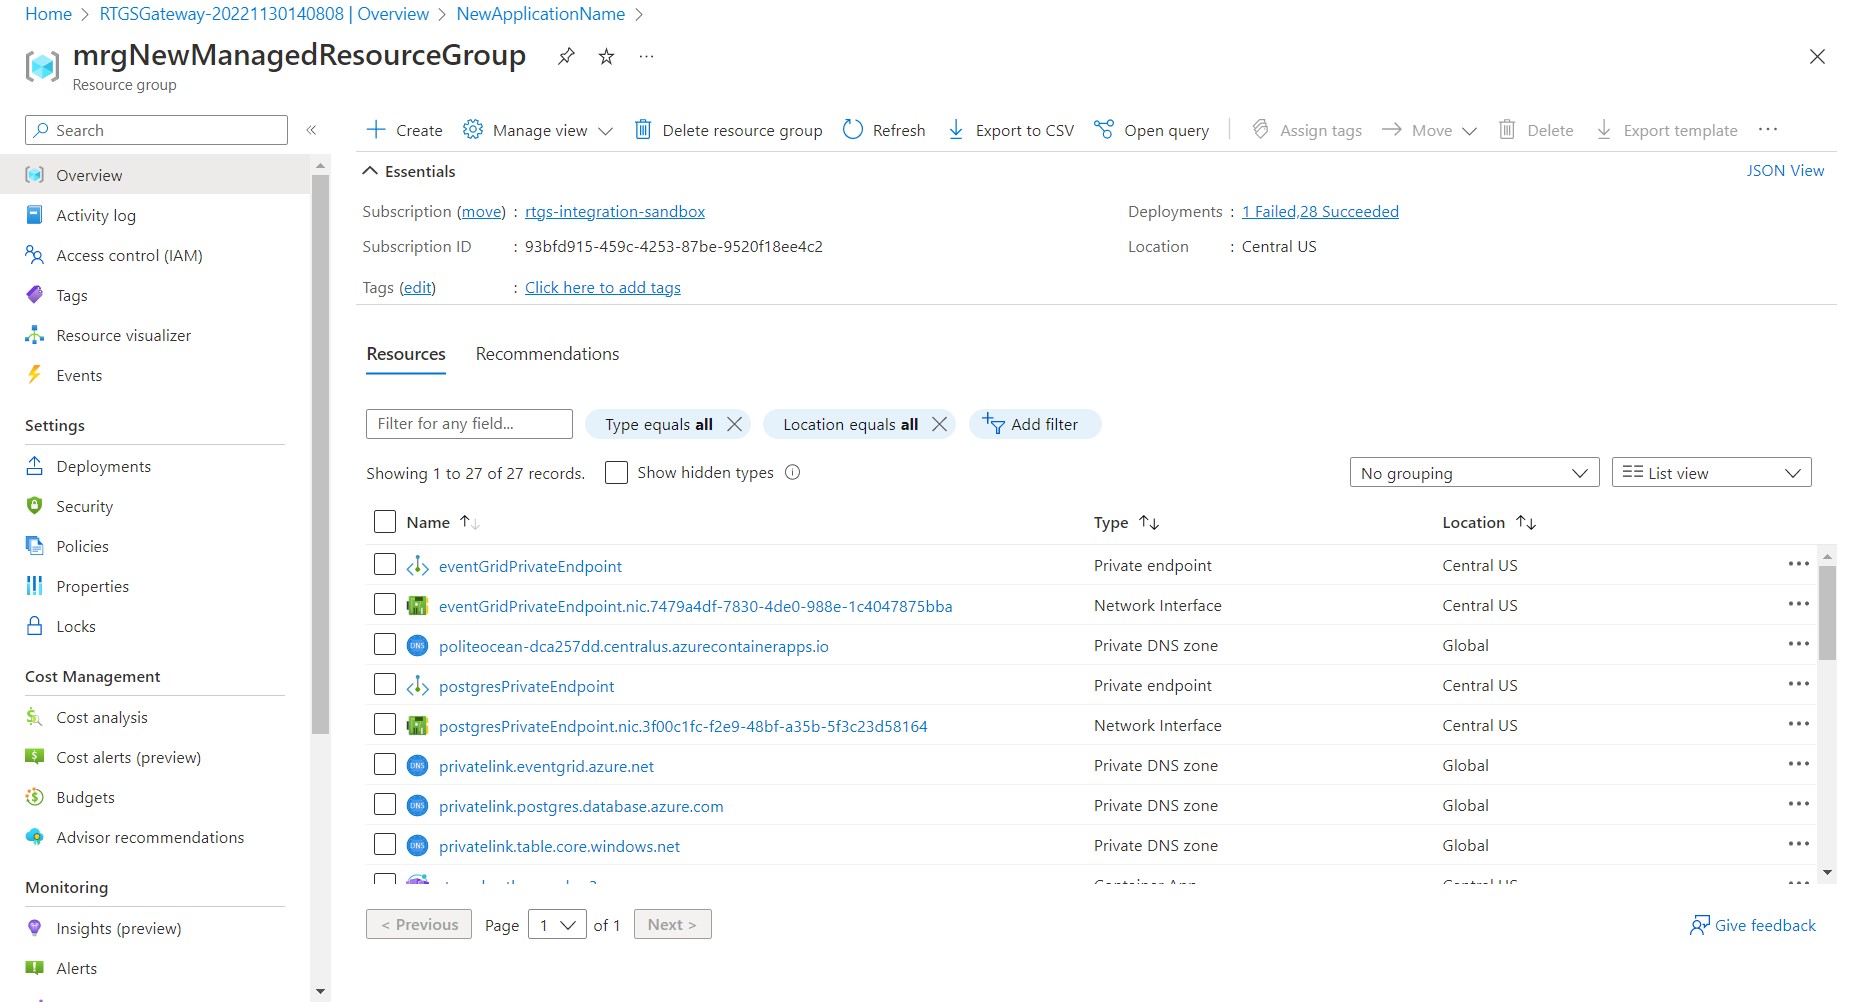
Step 10: Listing the gateway components
Clicking on the 'Managed resource group' link in the upper right of the overview screen will display the components that make up the gateway application and which were created and configured during the deployment.
This completes the RTGS.global gateway deployment.
Last updated