Deploying the Network Connector
Communication with the RTGS.global Network is achieved by establishing peering of your organization's virtual network with the RTGS.global virtual network in Azure
This section outlines the steps for setting up the RTGS.global Network Connector to access the RTGS.global Network. Once deployed, the Network Connector enables communication to the RTGS.global core services via the APIs described later in this document.
As outlined previously all RTGS.global members have an Azure VNet peered connection to the core RTGS.global Network through which all communications pass from member to member. To simplify and accelerate the onboarding process RTGS.global have created a virtual network deployment package that can be downloaded from the Microsoft Azure Marketplace.
The following steps detail the process to deploy the RTGS.global Network Connector. You must have Owner or Contributor role privileges in your Microsoft Azure subscription.
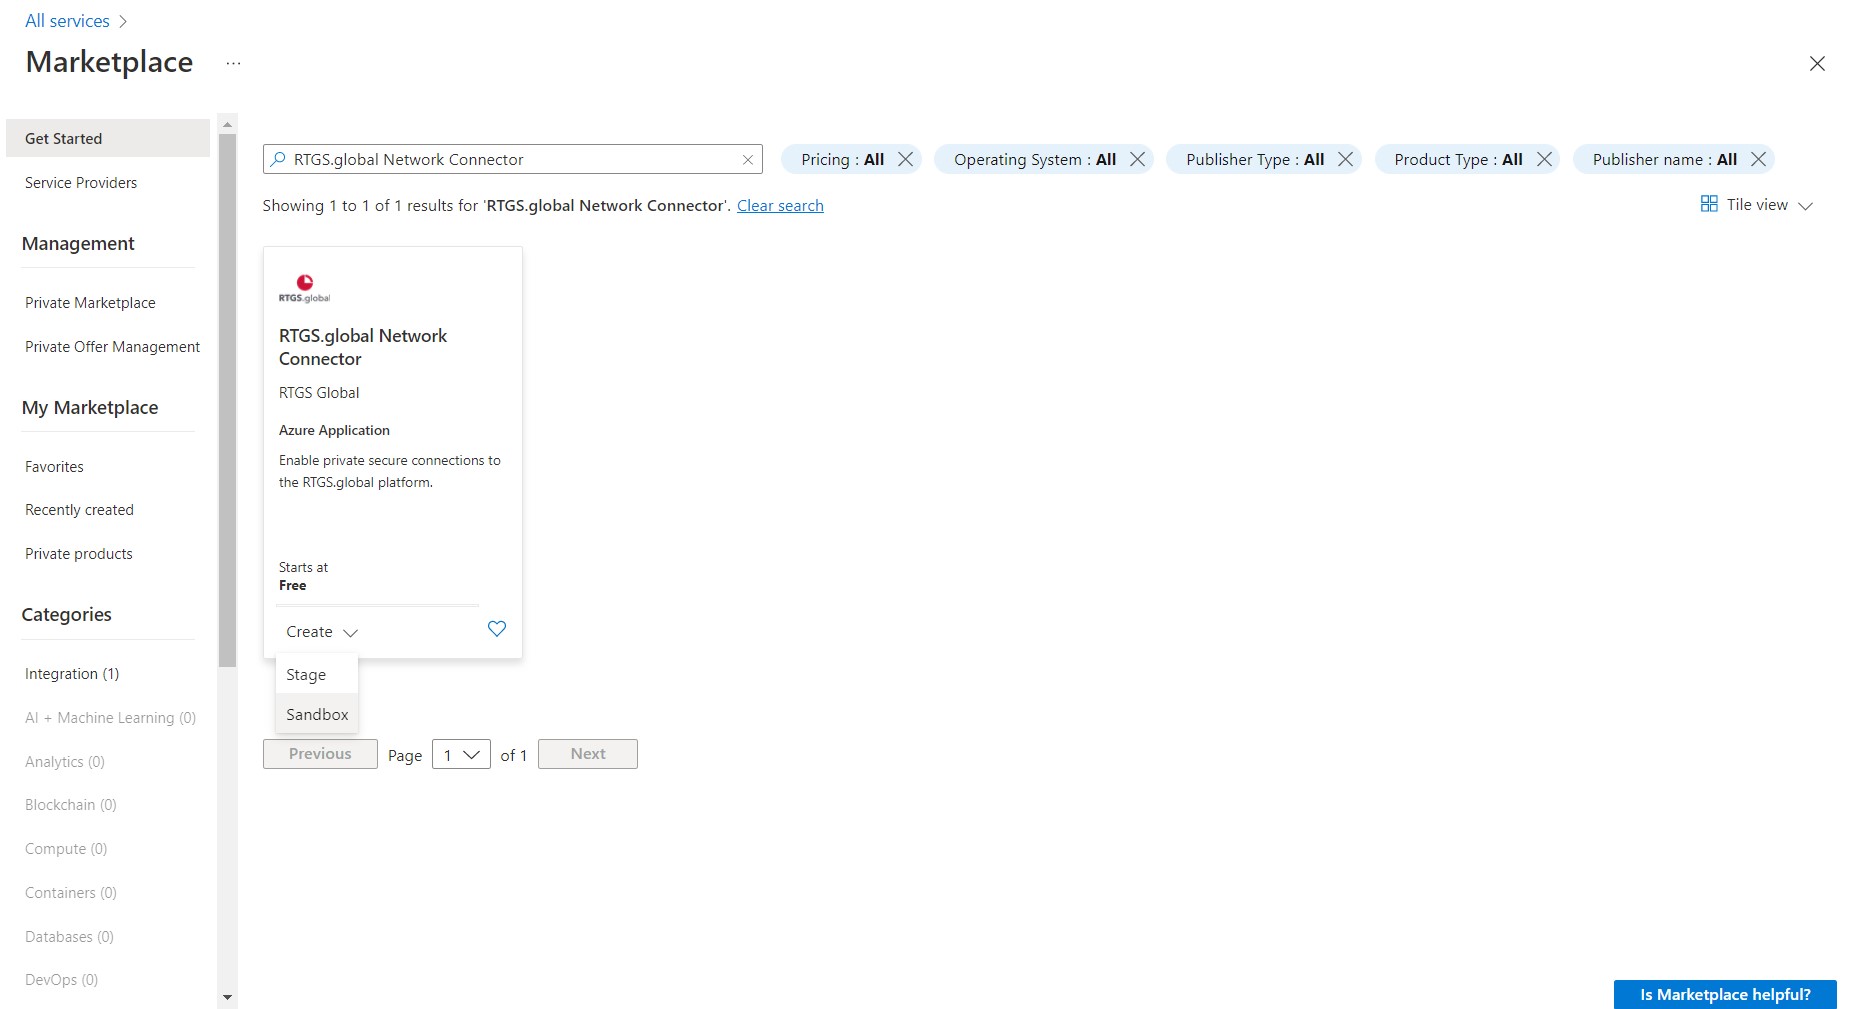
Step 1: Locate the Network Connector deployment package on Azure Marketplace
The RTGS.global Network Connector is available as a free public offering on Azure Markeplace from where the deployment can be directly done. Click the 'Create' menu and select the 'Sandbox' option, which must be used for ALL nonproduction environments, to take you to your Azure subscription where you install the Network Connector.
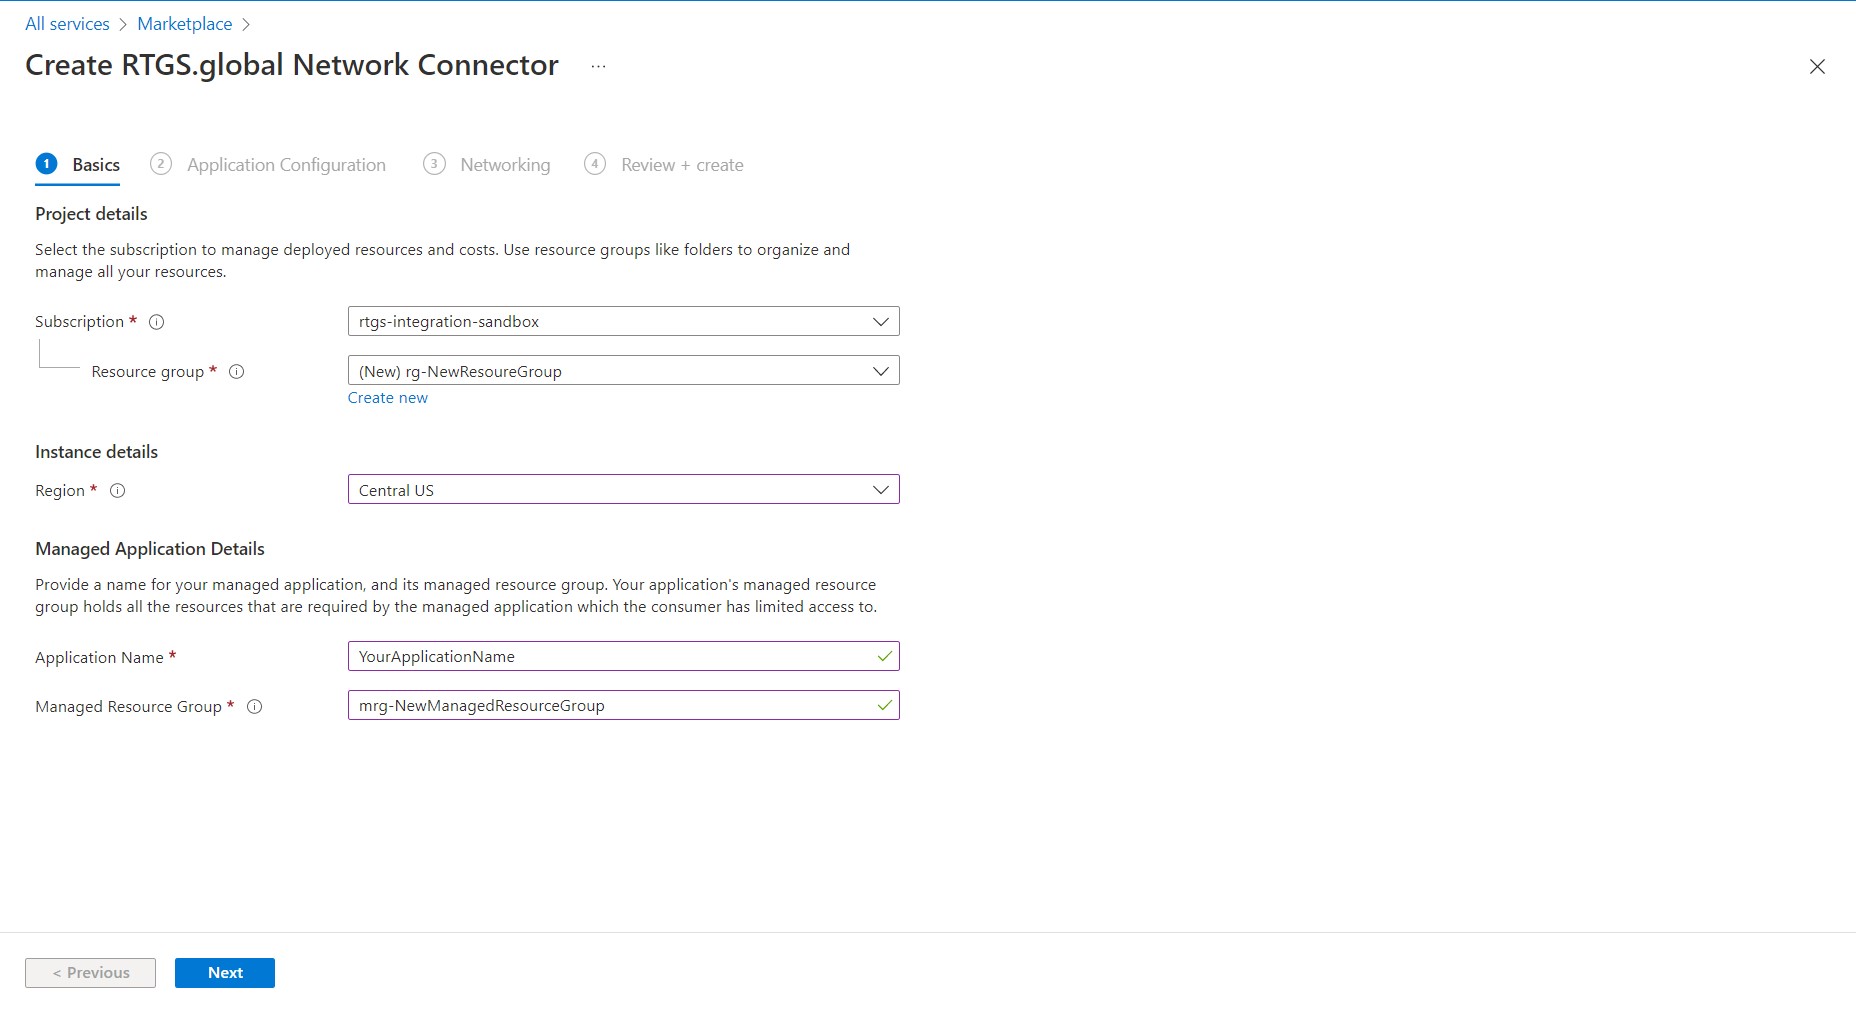
Step 2: Create the Network Connector deployment into your Azure subscription
The RTGS.global Network Connector setup is done using an Azure deployment wizard. It is recommended that the Network Connector is deployed into its own resource group which will be deployed as a managed application into your subscription. The application name should be unique to all other applications hosted in the subscription you chose, and for optimal performance select the region that is geographically closest to your data center physical location, or if the applications to be integrated with the RTGS.global Network are already deployed on Azure, choose the region that already hosts their deployment.
Click the 'Next' button to add configuration details required by the deployment.
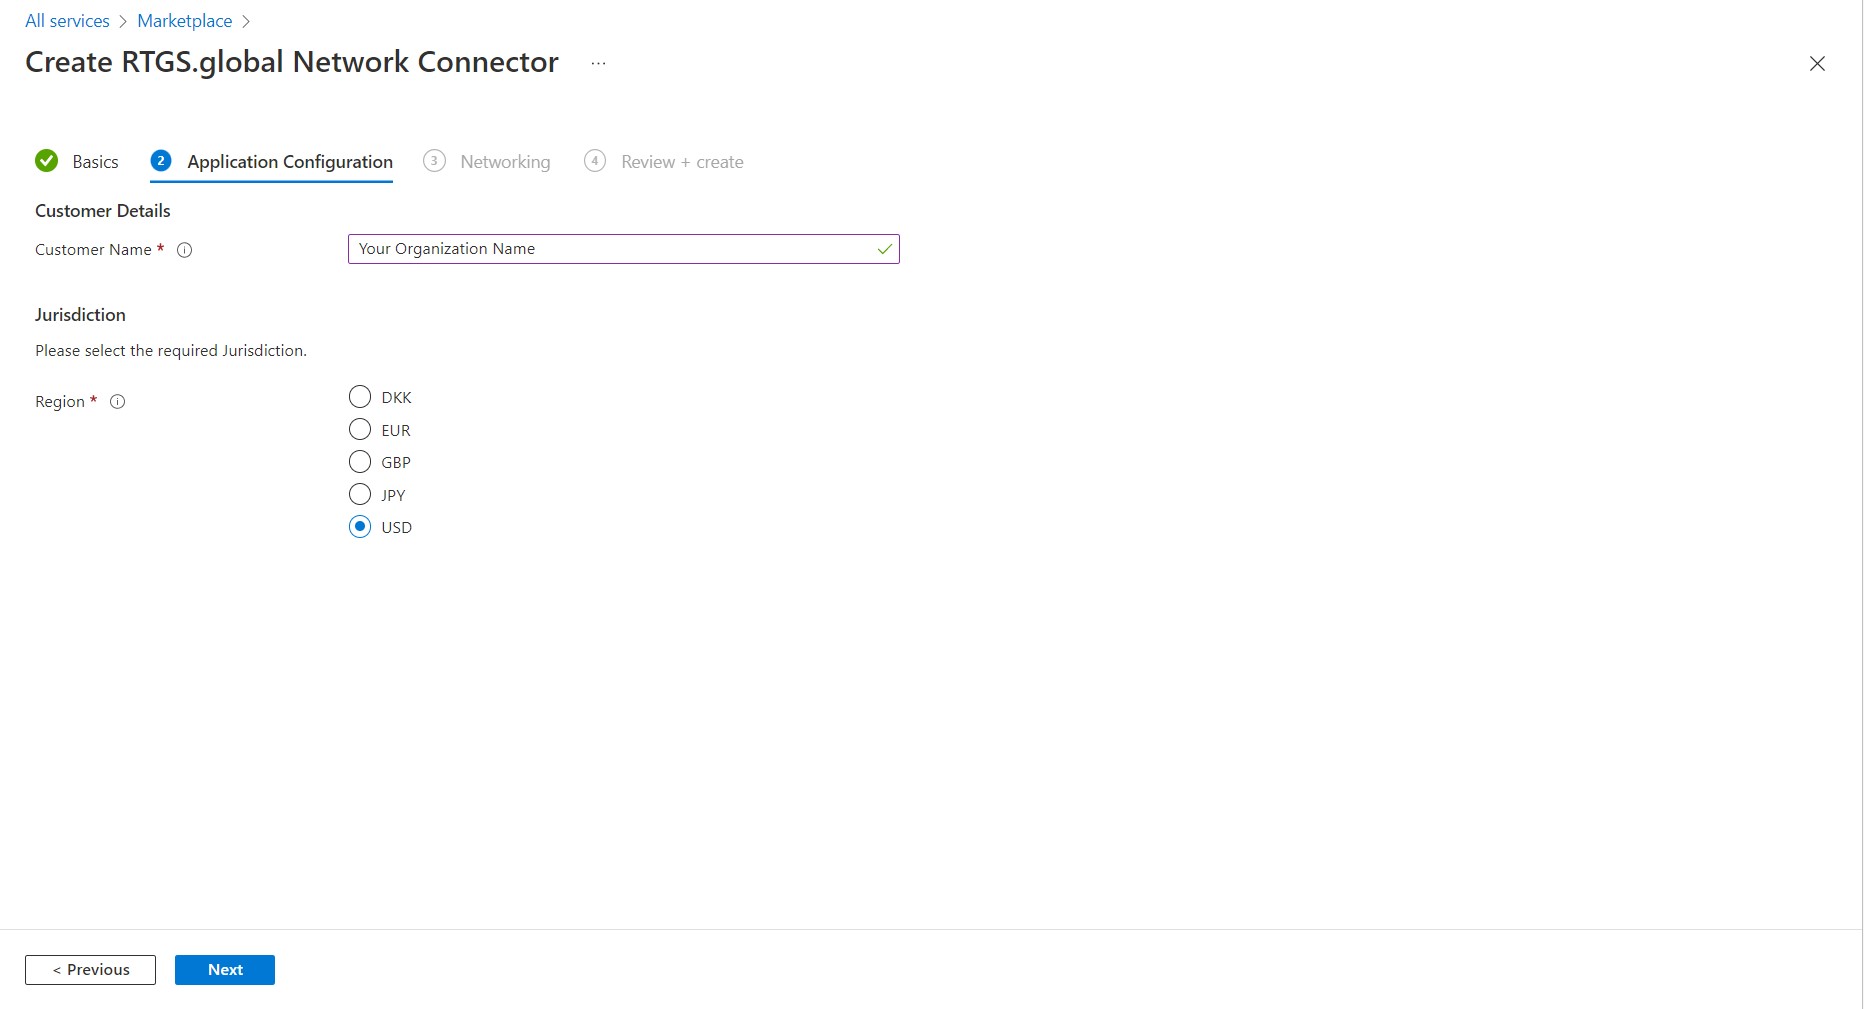
Step 3: Enter your organization details
Customer Name is the name of your organization that is registered with RTGS.global and Jurisdiction is the currency that you use to fund your transactions.
Click the 'Next' button to configure your virtual network for the Network Connector.
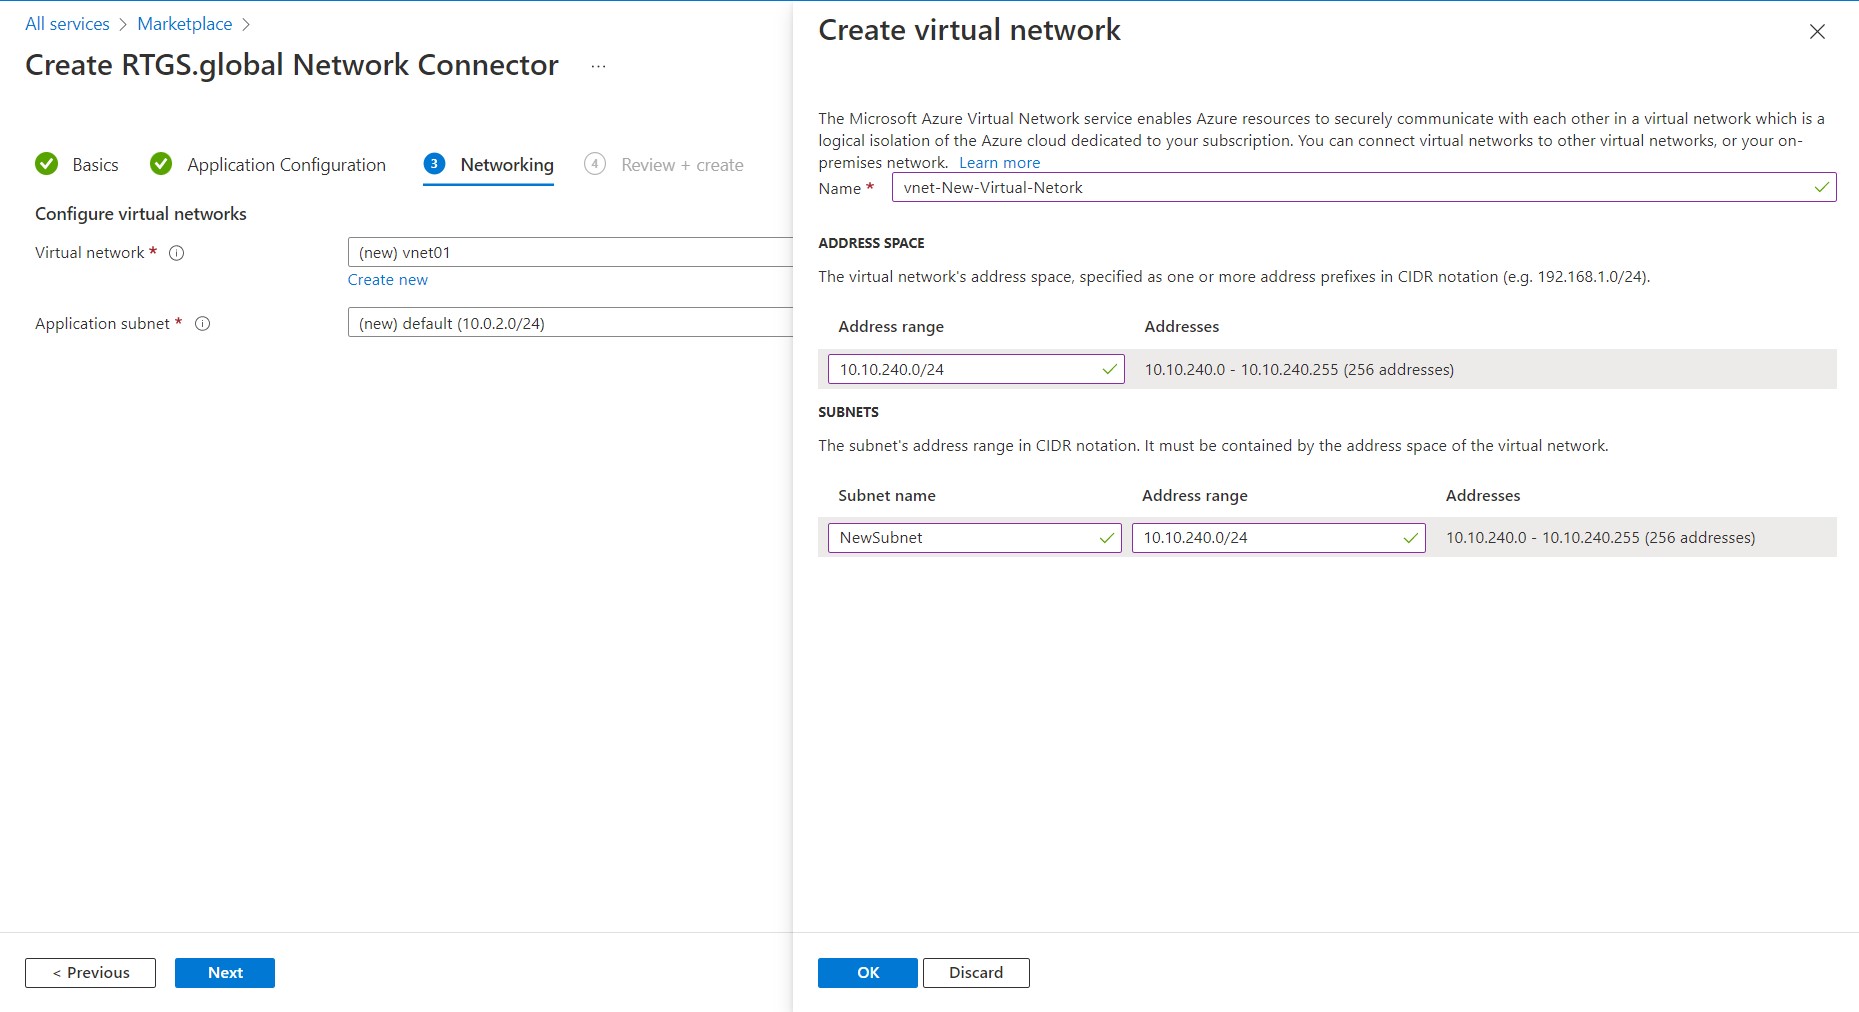
Step 4: Create a virtual network to peer with the RTGS.global Network
If you want to use an existing Virtual Network to peer with the RTGS.global Network then select it here, or create a new one. Again, the recommendation is to create a new one. If you choose to use an existing virtual network please ensure that it contains a subnet range that is restricted to IP addresses that are only used to communicate with the RTGS.global Network. This Virtual Network along with a Private Endpoint enables connectivity to RTGS.global Network.
Click the 'Next' button to finalize details and prepare the deployment.
Step 5: Create and Deploy the Network Connector
Please read the terms and conditions of usage, which includes RTGS.global having /admin access to managed resources that are created as a part of deploying the Network Connector.
When you are satisfied, check the agreement to the terms and conditions of use, and then click the 'Create' button to start the deployment which will take several minutes to complete.
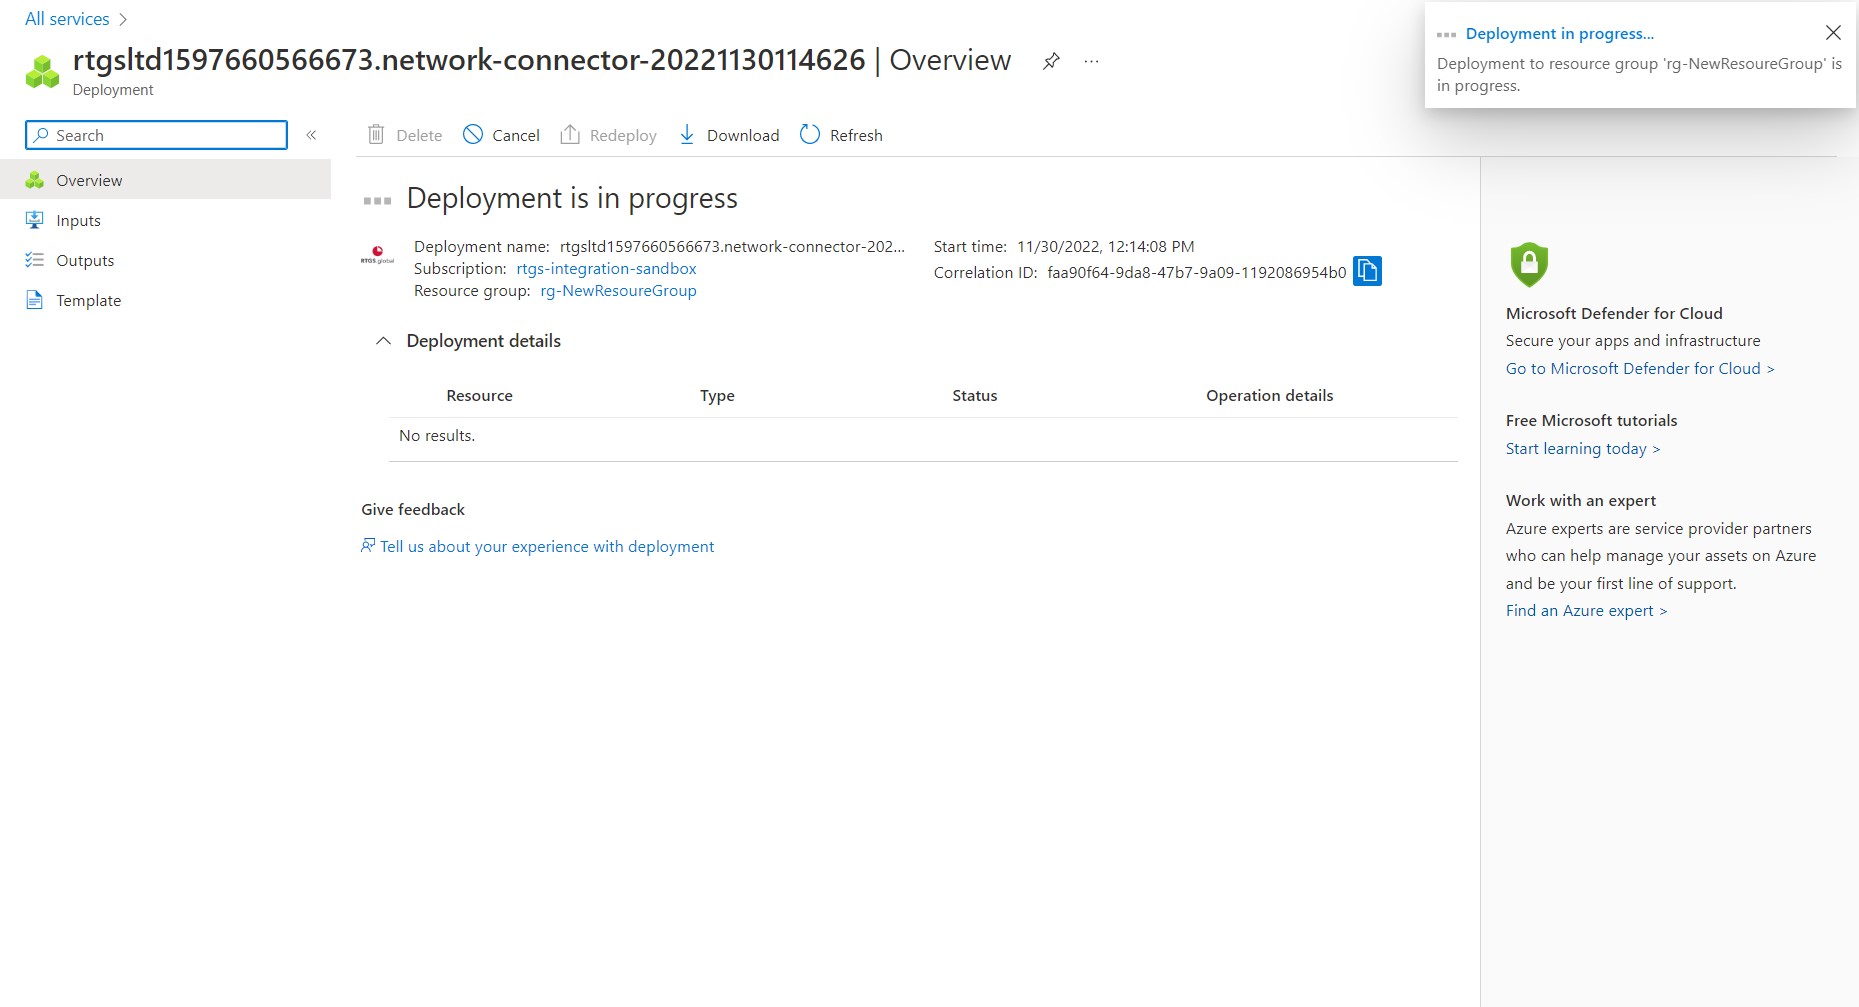
Step 6: Deploying the Network Connector
While the deployment is running in Azure the screen will reflect that is it taking place in the background. The screen does auto refresh but unless the deployment script encounters a problem you may not notice any change until the deployment is complete.
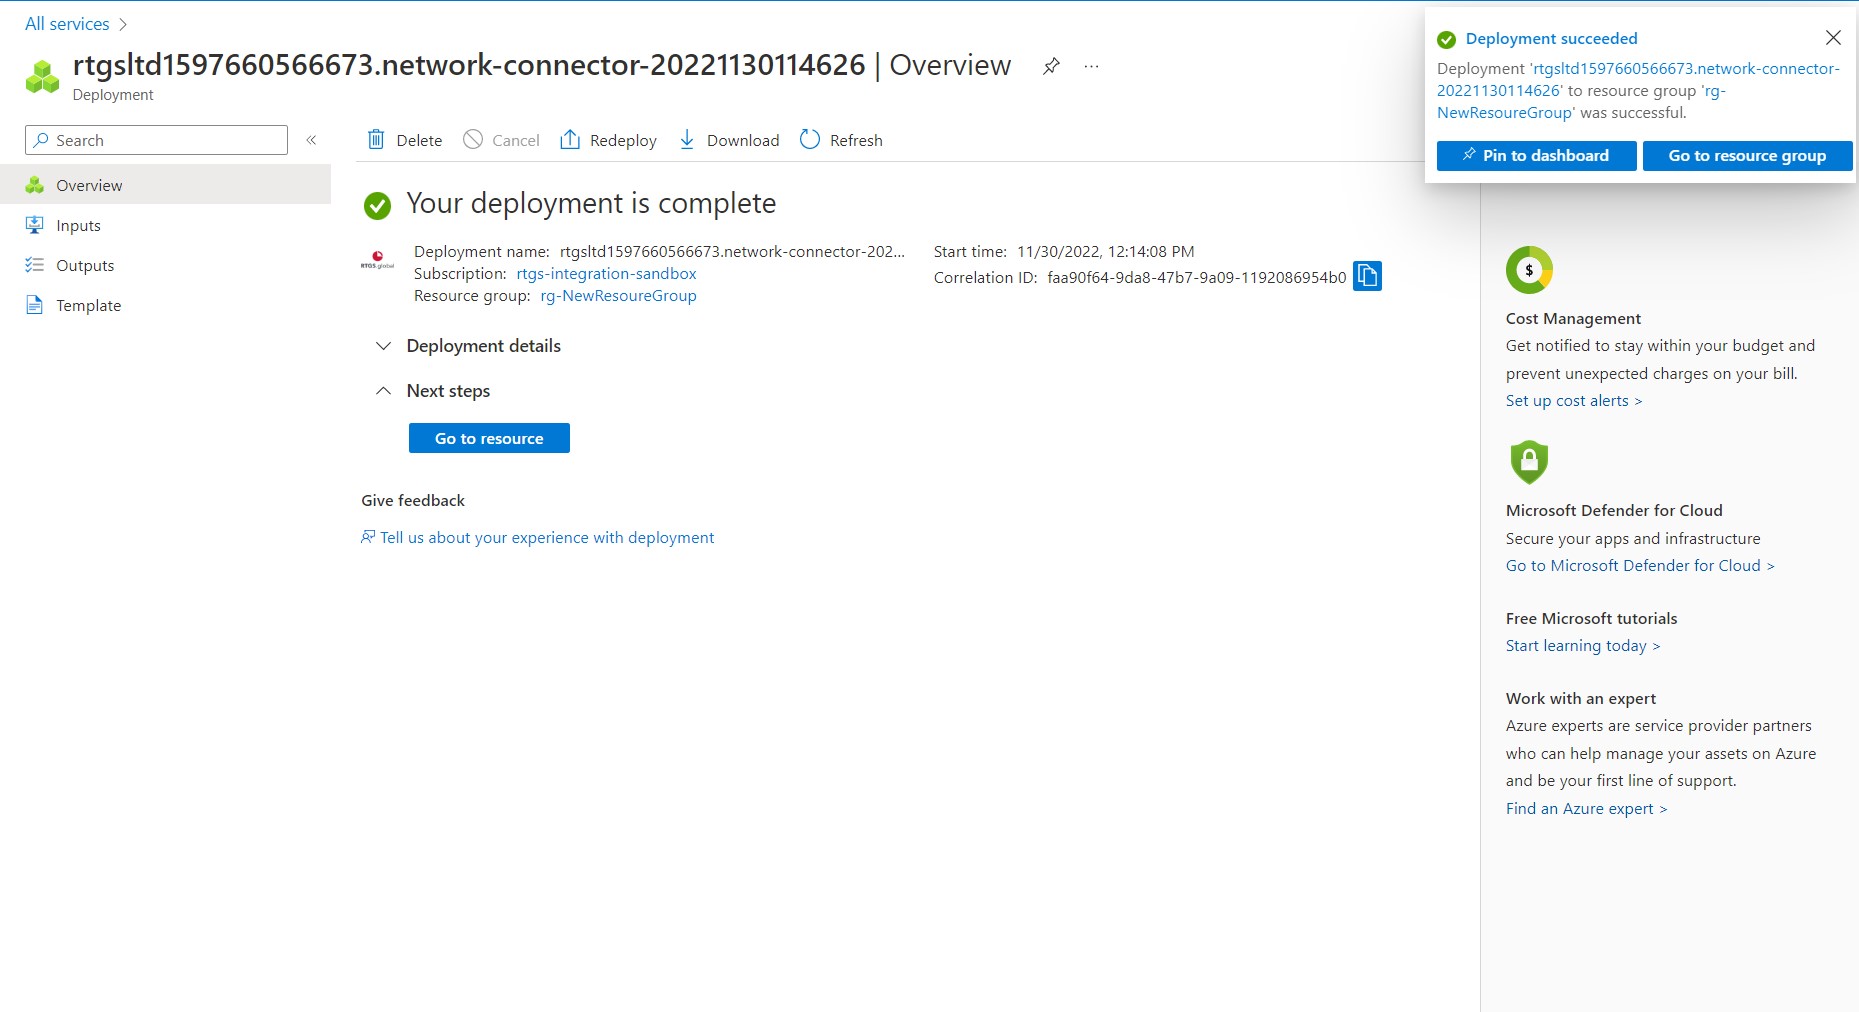
Step 7: Deployment complete
When the deployment is complete you will see the screen below. Click on 'Go to resource' to take you to the newly deployed managed application in your Azure subscription.
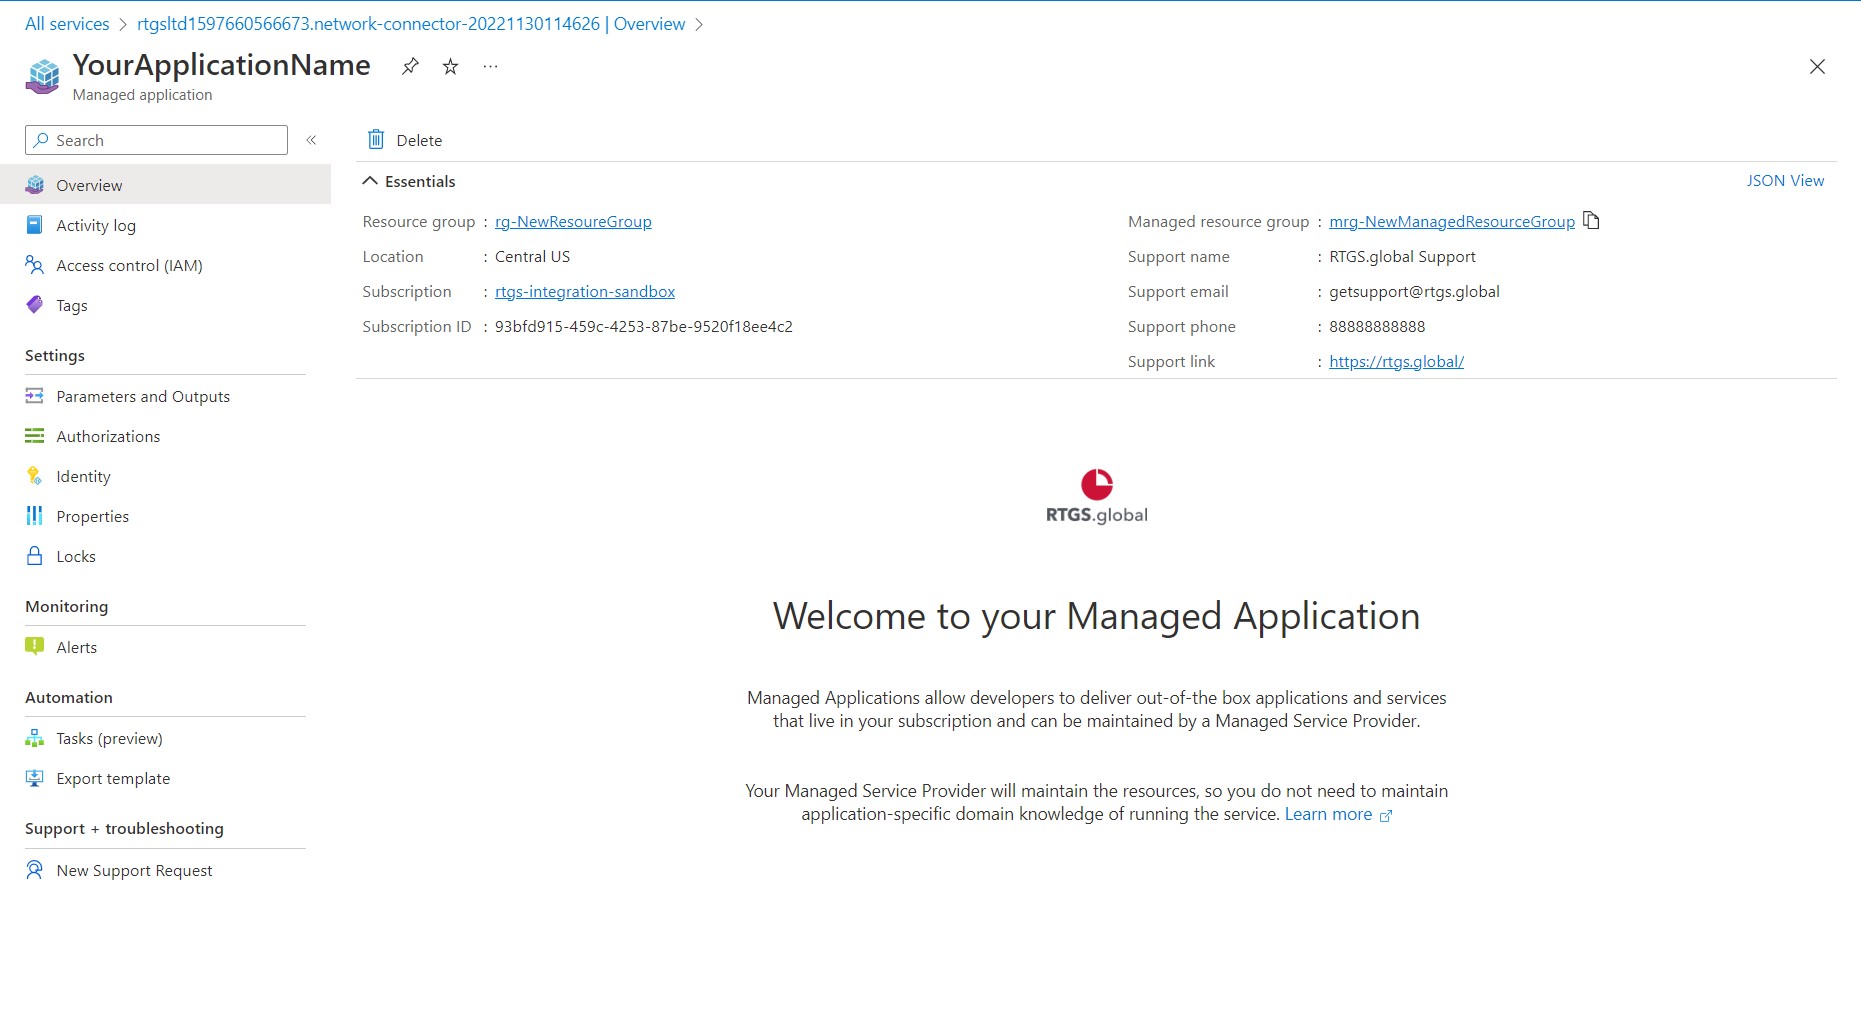
The application name that you provided earlier will be shown on the overview screen. To see the actual components that make up the application click on the 'Managed resource group' link toward the upper right of the screen.
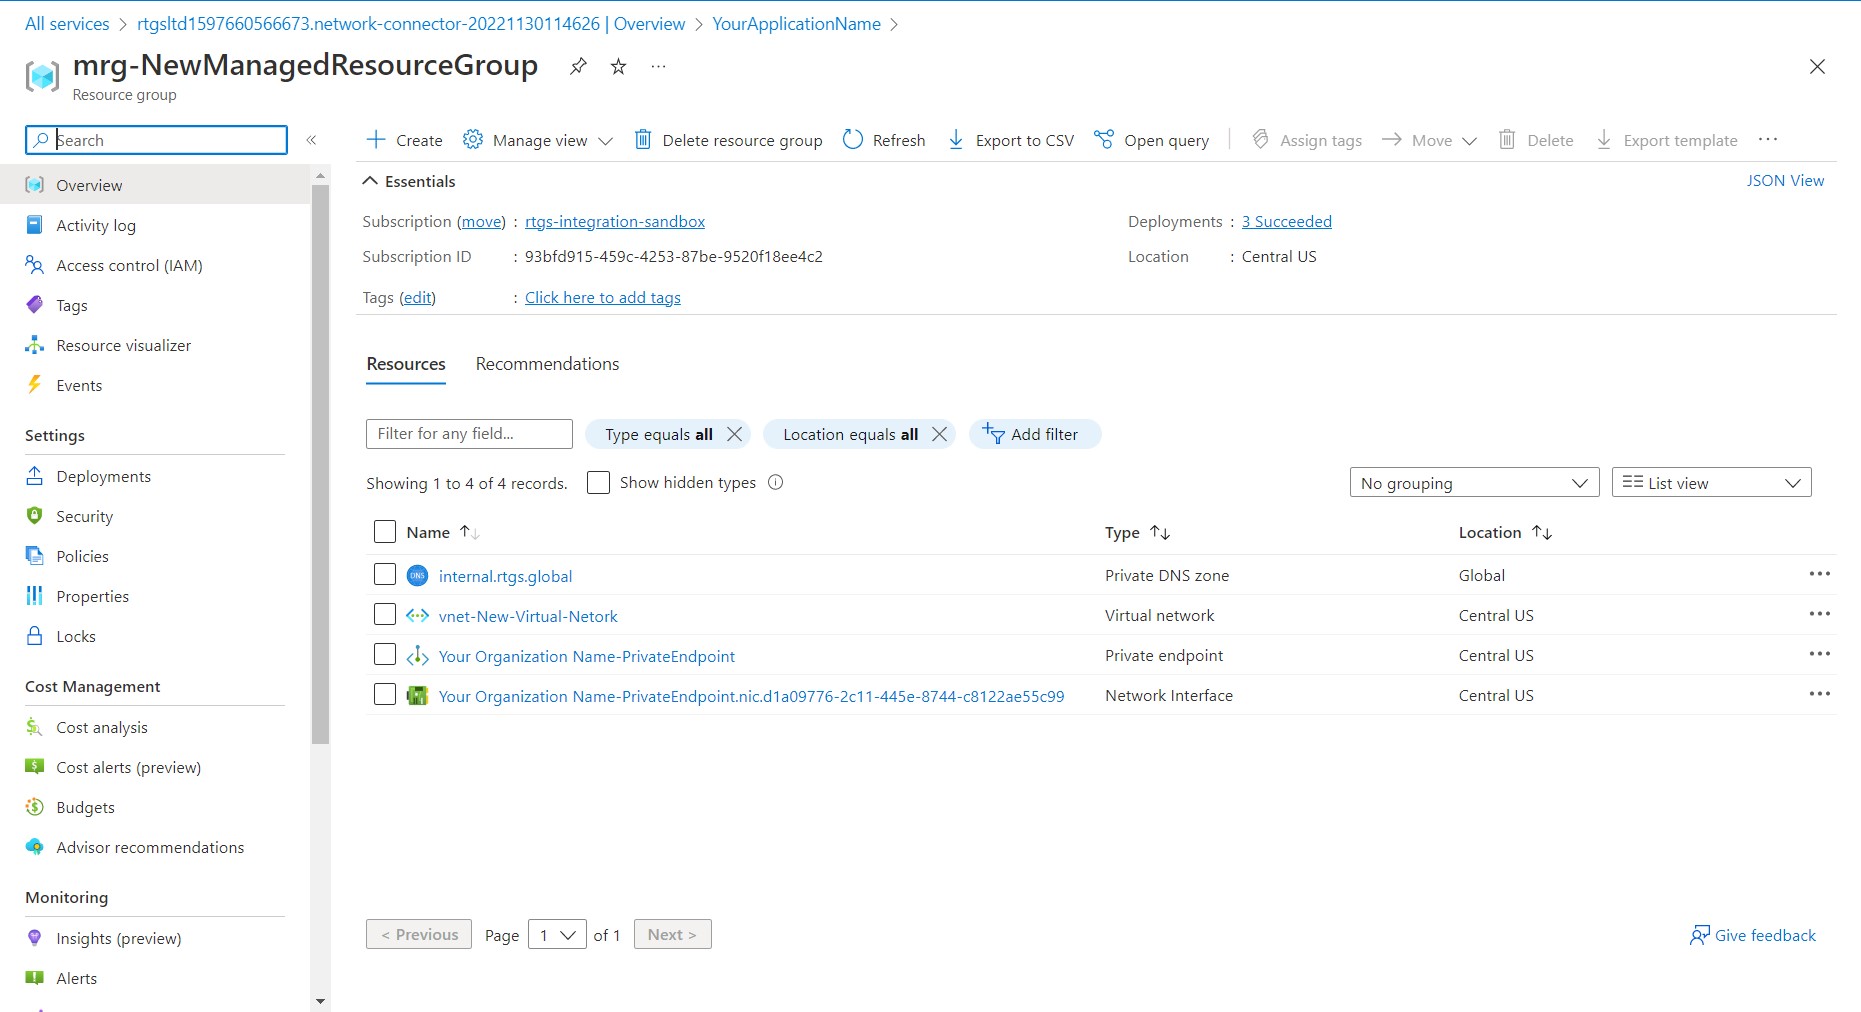
Note: The following resources are created in the managed resource group that is created by Network Connector deployment.
Virtual network
Private DNS zone
Private endpoint
Network Interface that is connected to the Private Endpoint
Step 8: Authorise the pending Private Link connection [For RTGS.global]
RTGS.global IT Security will need to approve the connection created by the deployment to create the VNet peering connection with the RTGS.global Network over the private Azure network. To request approval of your connection please email support@rtgs.com with the Application Name that you have given your Network Connector in Step 2 above. Once approved, the Network Connector setup is complete and you will be able to invoke RTGS.global core services over the private link using the RTGS.global Gateway APIs.
Last updated